DIY
Paper Lanterns With Henna Designs
Hello,
I am going to share another Henna designed Paper Lantern with you..I have done it a few days back,if you are a new comer at my blog, you can also visit my previous henna designed Lanterns Here & Here
Well my today’s design is more thick & floral..
I will like to share this with you now!
Have a look please..
Paper Lanterns With Henna Designs
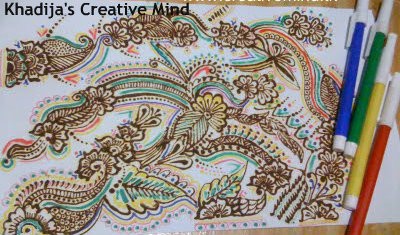
You can also check its more detailed tutorial at my previous posts, now i will show you a little before & after..
You will need to have a Henna cone, a few colored markers & A4 size paper sheet..
First apply henna on the paper, & let it dry! then fill the designs with different colors.it will be fun to fill tiny spaces with markers :)
Now connect both sides of the paper with duel sided transparent tape..& it has turned out into a cute lantern! how easy to replace a plain paper into a cute designed Lantern..hmmm
I think its the best design i have ever done for lanterns..isn’t it??
well its another lantern..but my favorite one!!
very soon these lanterns will take their visa+passport for moving towards Seattle,Washington..hmmm..
Hehe..actually I am sending these to my friend, she is going to celebrate her 18th birthday on this 27th plus her graduation party is also around, hopefully she will receive these lanterns in time!
Important to know..!!
Use Mod Podge over it..so the henna herb will not be dropped while any curve..it will seal the whole design :)
Have a colorful day !!















67 Comments